
¡Hola profe! I can’t believe September is over already! Time is just flying by!
This week, I wanted to continue my series on how to introduce AP Spanish Language and Culture exam tasks to lower-level students. I firmly believe that preparing students for AP success begins in Spanish 1. The more students practice the tasks in the years leading up to AP, the more they’ll feel like second nature to students. They will know what to expect from the test, and what the test will expect from them.
In my last post, I talked about how to scaffold the email reply, and this week, I wanted to share tips for scaffolding the simulated conversation. This is an interpersonal speaking task in which students listen to five conversation exchanges and respond appropriately, according to prompts on a provided outline. There are five exchanges in all and students are given twenty seconds to respond to each one. The conversation outline that is given to students contains an introduction with some details about the conversation and tells students what to expect from each exchange they hear (i.e., te hace una pregunta, reacciona, continúa la conversación, etc.), and what they must do for each exchange they must return (contesta, haz una sugerencia, explica por qué, etc.). Unlike the email reply, students use the familiar register (tú) to respond.
Don’t panic, profe – I promise that the task WILL become easier and more manageable for students with practice.
So, how can you start practicing the simulated conversation with lower-level students? First and foremost, make sure that you keep your expectations consistent with students’ current proficiency levels. Can a Spanish 1 or Spanish 2 student communicate at the same level as an AP student? No. Can they still participate in a simulated conversation using vocabulary and structures that they know? Absolutely!
Next, teach students about the task and provide scaffolding and support when needed. Your lower-level students will likely become overwhelmed if you hand them a conversation outline, start playing a recording, and expect them to verbally respond. You can certainly work up to that, but here are some ideas for scaffolding the simulated conversation to help establish familiarity and comfort levels with your lower-level students:
#1: Examine a conversation outline together as a class.
Understanding the way the simulated conversation will work is half the battle – if not more! Prepare a conversation outline for a simulated conversation task that would be appropriate for your class. Let’s say your Spanish 1 students are completing their introductory unit. Imagine a simulated conversation task in which students are meeting a Spanish-speaking exchange student for the first time and are going to exchange pleasantries. Write your conversation outline that includes a brief introduction to provide students with the context of the task. Then, draw up an outline for each exchange of conversation.
When you are outlining the conversation exchanges, use language that is used on the AP exam and get your students used to seeing certain words/phrases! These are some common ones that I recommend including:
- Te saluda
- Te hace una pregunta
- Reacciona
- Continúa la conversación
- Te pide…
- Contesta/Responde (con detalles)
- Explica por qué
- Haz una sugerencia
- Rechaza
- Despídete
Familiarizing your students early with these words and phrases will help ensure that, when the time comes for them to take the AP exam, they understand what they read in the outline and are able to respond appropriately!
During class, give each student an outline and go over the introduction with them. What words/phrases stand out and what clues might they give about what students might hear during the conversation? What information will be important to keep in mind when framing their answers?
Next, go on to the exchange prompts and discuss as a class what students will need to do (answer 3 questions, include details, reject a suggestion, etc.). Have students underline or highlight important phrases that tell them so.
Emphasizing the importance of the conversation outline is so crucial – students can give wonderful answers to the prompts on the AP exam, but if they do not follow the prompts, it’ll show in their scores. For example, if an exchange prompt tells students to reject a suggestion and offer something new but students agree with what was suggested instead, that factors negatively into their overall score. Fortunately, practicing the language of the conversation outline with students can help them avoid these pitfalls in the future!
#2: Listen to simulated conversation exchanges and come up with possible replies as a class.
Once you have reviewed the introduction and the conversation outline with students, begin playing the individual conversation exchanges one at a time. Give students time to listen and think about what they could say in response, ensuring that it corresponds to the prompts on the conversation outline. You may want to ask students to think of a few different possible answers.
After students have had time to think, make a list as a class of possible acceptable responses. Double-check as a group that these would be appropriate responses based on the outline. Then, brainstorm ways to add details and elaboration to enrich their responses. I always remind my students to try to use the 5 Ws (who, what, where, when, why, and how) to help them elaborate more.
Repeat this process for each exchange until you reach the end of the conversation!
#3: Have students complete a simulated conversation in pairs or small groups.
Once students are feeling more comfortable with the simulated conversation task itself, it’s time to start having students respond to one. I like to put my students into pairs (although groups of 3 could work too), provide them with access to a recording of a level-appropriate simulated conversation, and send them to work through it together. Not sure how to provide the recording to students? Here are some great platforms to choose from!
Typically, I will upload an audio recording to my LMS, Canvas, and send students out into the hallway with their Chromebooks and a copy of the conversation outline. I have students sit with their partners, and pairs must sit a certain distance away from any other groups. Students are allowed to then listen to the conversation exchanges at their own pace and verbally reply to them. I typically have one student start to reply and speak until they have nothing additional to say. Then, the second student should be ready to pick up where the first student left off, correcting any mistakes that they heard or adding details and additional information. Afterwards, students switch roles.
I do ask students to record and upload their attempts – I do not grade them for accuracy, but it does provide with me information about how my students are doing. It also provides me with the opportunity to give feedback and suggestions for improvement. If I hear a really great response, I will share it with the class (with student permission of course!) and we talk about what makes the response an exemplary one.
#4: Have students complete a simulated conversation individually without time constraints.
The next step is to have students complete a simulated conversation on their own. At first, I do not impose any time constraints. I still provide students with a conversation outline that includes an introduction and prompts for each exchange. Students can access the recording of the conversation and are allowed as much time as they need to verbally respond. I do not permit additional outside aids (vocabulary lists, etc.) at this point, but you may decide that additional supports are still needed for your students and that’s totally fine!
Once students have completed the task, I like to have them listen back to their responses and complete a reflection. Students supply evidence from their own replies to answer questions about how well they completed the task. Here are some questions I like to ask:
- Did you respond to the prompts with appropriate responses? Give examples. If you did not, how could you have responded differently?
- Did you respond with a lot of details/elaboration? If you did not, what could you have added to make your responses richer?
- Comment on your vocabulary usage. Did you use any unit vocabulary? How about idiomatic expressions? Give examples. If you did not, what could you have added?
- Did you make any significant grammar errors that impede comprehensibility? Give examples, and correct them.
- Comment on your pronunciation. Were there any words you mispronounced? Give examples.
- Did you use the appropriate register (tú vs. usted) for the situation? Were there any shifts or inconsistencies? Give examples.
I have found that, for the most part, students are able to evaluate their work fairly well, and they definitely get more accurate with practice! I usually will read through the self-evaluations and leave additional comments to help students improve in the future.
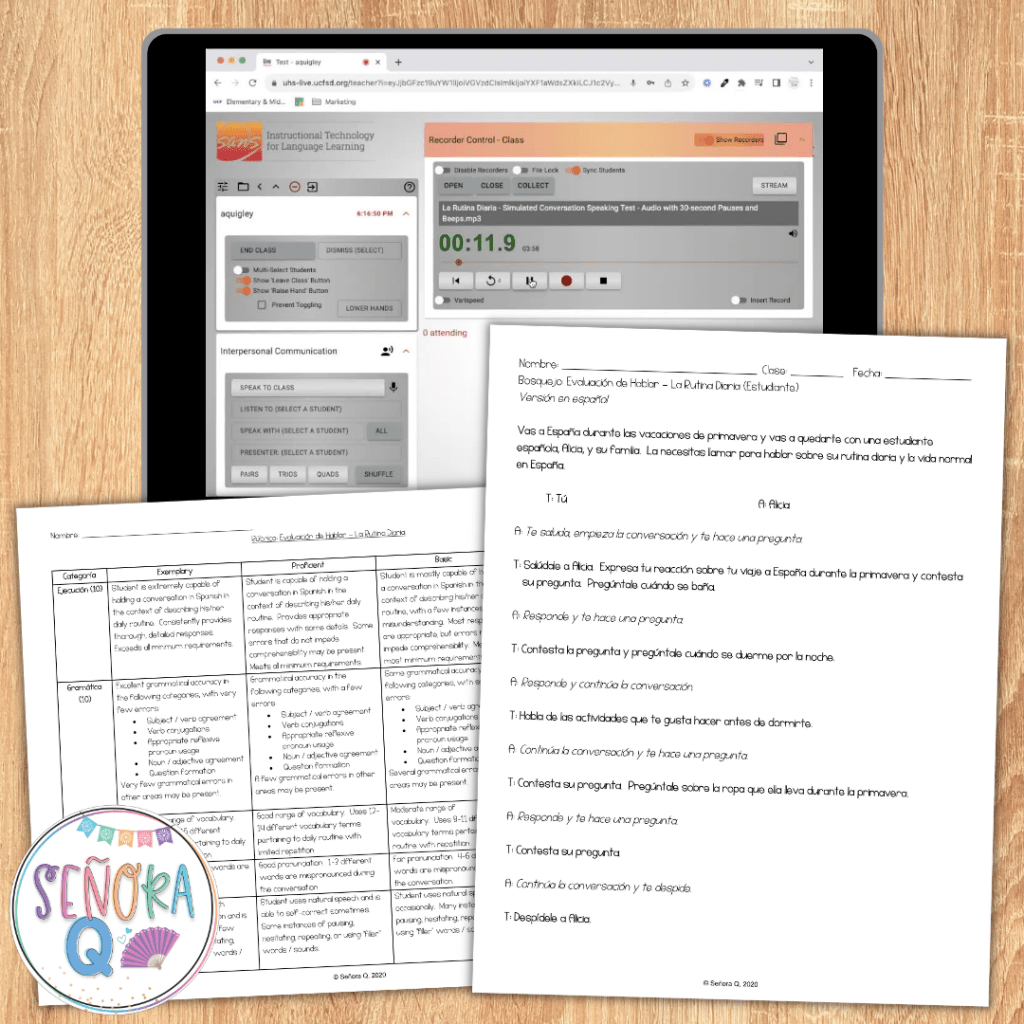
#5: When students are ready, practice the task with AP test parameters.
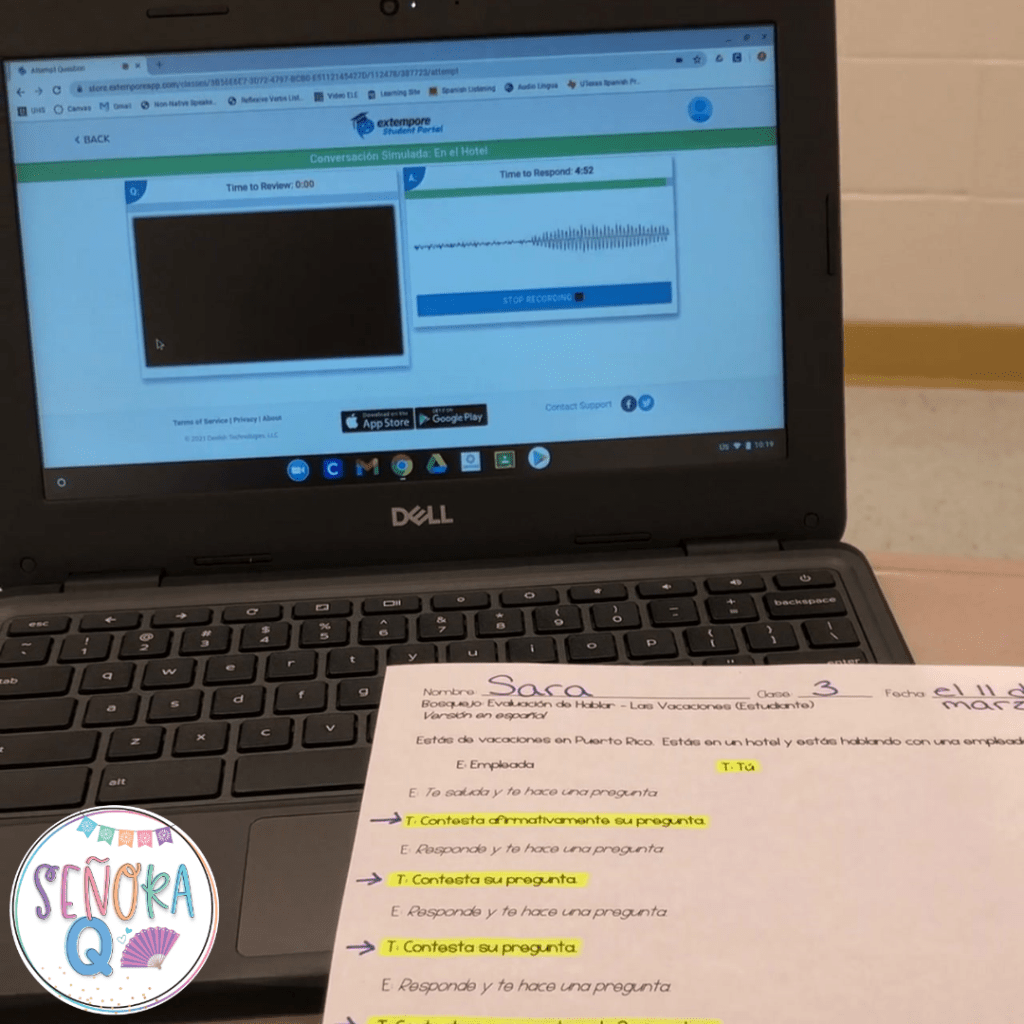
The final step is to have students complete a simulated conversation with the AP exam time parameters (1 minute to read the introduction and outline and 20 seconds to respond to each exchange). I recommend making a recording of you or a colleague reading the conversation exchanges. Make sure to leave 20 seconds of silence between each exchange for your students to answer! A recording will be necessary if you plan to use technology to have students complete the simulated conversation! These are some great options for conducting the simulated conversation with your classes:
- Play your recording of the conversation through your classroom speaker and have students record their responses via the Voice Memos app (iPads/iPhones) or Camera app (Chromebooks). Other recording programs, apps, or extensions may be available for your students to use, depending on their specific devices. Have students share their recordings with you in some way (email, upload to your LMS, etc.).
- Create an assignment on your LMS (Canvas, Google Classroom, etc.), and have your students create a screen recording, giving their responses as you play the recording of the conversation. This will make it easy for you to collect students’ answers!
- Use a website such as Charlala or Extempore. Both sites can be used for free, with upgraded features available for purchase if you like.
Once you have finished the recordings, you could either use the AP rubric to evaluate students or you can have them evaluate themselves as they did before!
Final takeaway: It can seem daunting to try AP tasks with lower-level students. Believe me, I was SO skeptical when I first started, too. But I promise that, with the proper scaffolding and support, your students absolutely can do it!
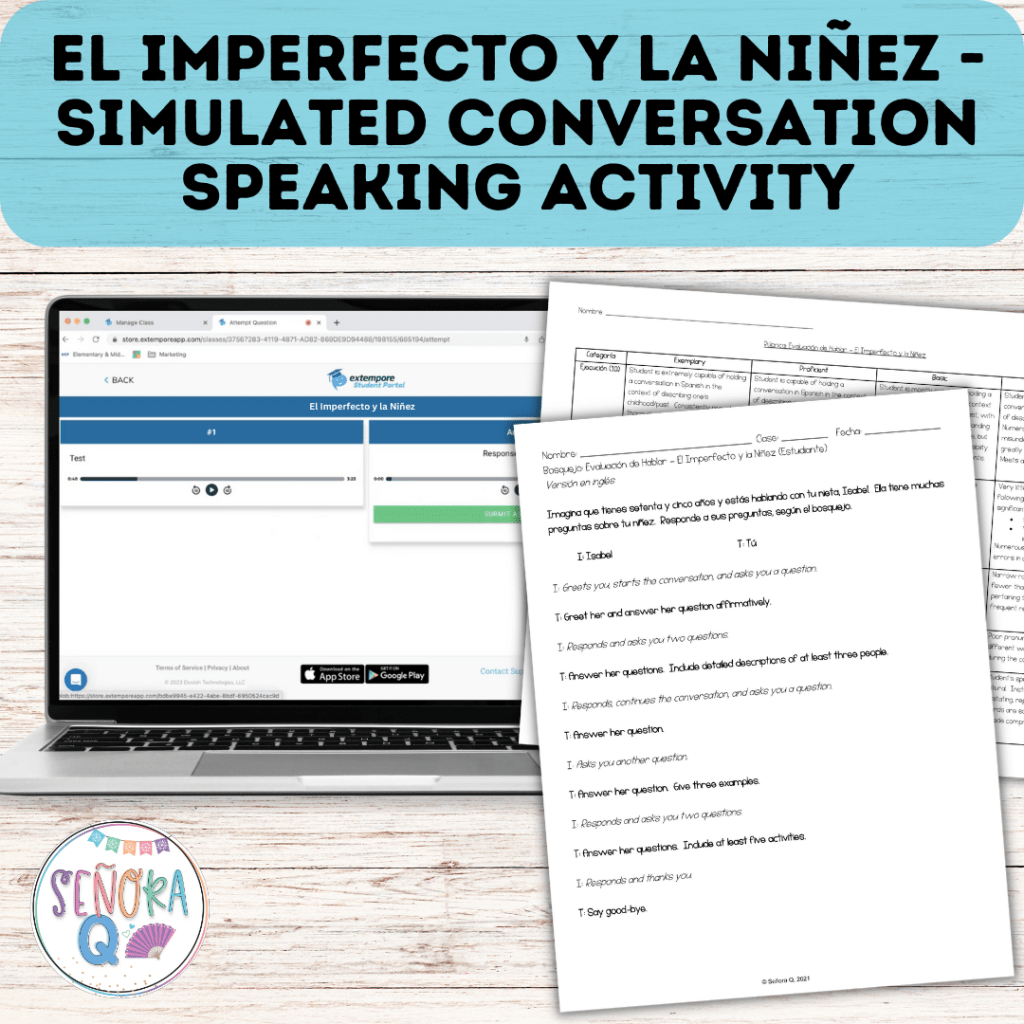
If you’re looking for simulated conversations that you can utilize in your lower-level classes, here are some of my favorites:


I hope this was helpful! Please feel free to leave me a comment or send me a message if you have any questions about getting started with the simulated conversation! Have a wonderful week, profe!
