


¡Hola profes! Today, I wanted to talk to you about…GAMES! Adding games to my lessons is my favorite way to engage my students. When we play games in class, even my most reluctant students are more eager to participate.
Don’t get me wrong – I am a HUGE fan of digital games like Kahoot!, Blooket, Gimkit, and Quizlet Live. The options for these platforms are endless and are convenient if your school is 1-to-1. But sometimes I don’t want to use devices, or I’d prefer to use them minimally. There’s something to be said for moving around, using manipulatives, and working in teams, you know? Here are my (and my students’) top 5 favorite low/no-tech games to play in Spanish class.
#1 Board Games
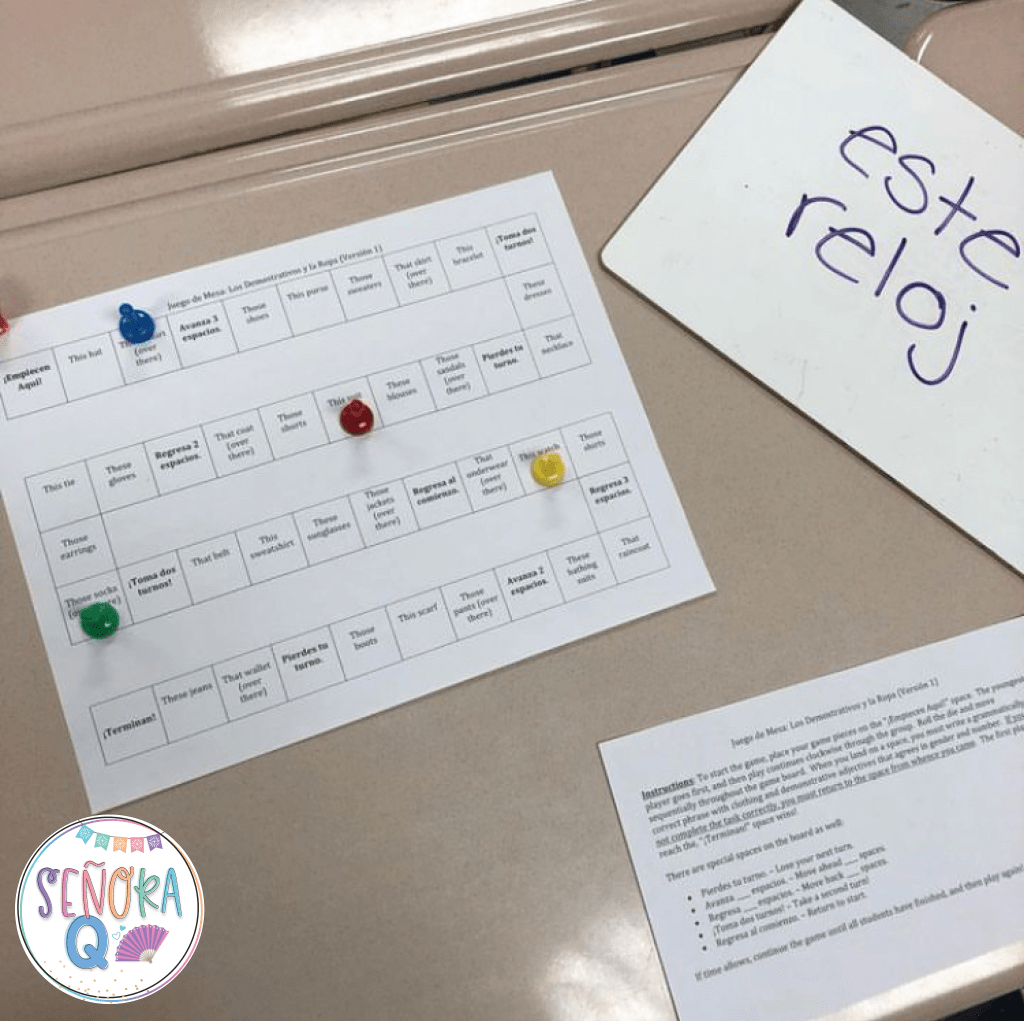
Board games have been a fantastic way for students to practice virtually any concept that we are studying in class! Many years ago, I created a template on Microsoft Word by creating a table and removing the gridlines of the boxes I didn’t want to use until I made a winding path. (If that’s not your thing, I totally get it! Browse my list of ready-made board games to save yourself time and any potential hassle!) Then, I fill the spaces with a verb to conjugate, a sentence with a blank to fill in, a question to answer, a picture to identify, or whatever will reinforce the content of the unit! I also add special spaces, like “Lose a turn” or “Move _____ spaces forward/back.”
To help make game play easier, I also have an instruction sheet that tells students how they should move through the game board and how to win. Since I usually keep my games the same, I can reuse these instruction sheets over and over again!
To play the game, I place students in groups of 3-4. Each group gets a game board, an instruction sheet, game pieces, and dice. You can raid your own board game collection at home for game pieces and dice if you like, or you can purchase them. (I bought a pack of game pieces and a pack of dice on Amazon in 2012, and I still consider it to be one of the most worthwhile purchases I ever made for my classroom! I use them CONSTANTLY!) Students move through the board and complete the task on each space. I tell my students that they have to answer correctly in order to remain on the space (otherwise, they have to go back to the space where they started their turn), but you can make your own rules!
To make this a speaking activity, have your students verbally give the answers. If you prefer written practice, I have each group use a mini white board where players should record the answers. Group members should confirm if each answer is correct or not. I circulate throughout the room to settle any disputes or answer any questions about this!
I have found that board games help foster student engagement, reinforce unit content, strengthen relationships between students, and offer opportunities for collaborative learning and peer teaching. Students who are able to explain correct or incorrect answers to others tend to show better understanding of that content later on!
Board games typically take about 15 minutes to play in my classroom. If you want the game to last longer, students could always play again – it’s likely they will land on new spaces and have the chance to correctly answer questions they got wrong the first time they played!
Try it Free!
Sign up below to receive 2 FREE Spanish-speaking countries board games that your students will BEG to play!
If the idea of board games intrigues you but the idea of making them does NOT, feel free to check out my collection of ready-to-print board games!
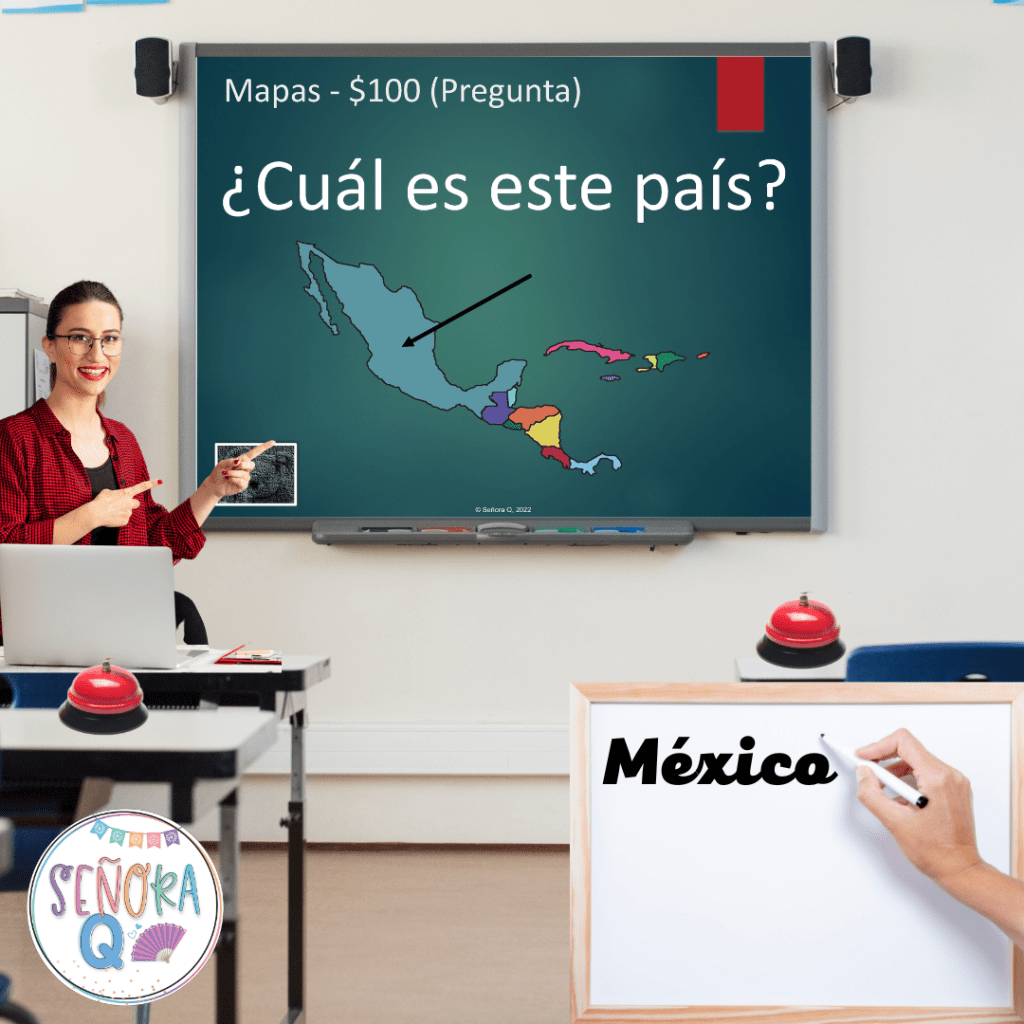
#2 Jeopardy-Style Trivia Games
Jeopardy-style trivia games are my absolute FAVORITE review games before a test or quiz! My students get very competitive and work well with their teammates so that they can win!
Like board games, these trivia games can be customized to practice the content of virtually any unit. This versatility is one of the major draws of this activity, in my opinion – once you have a template that works for you, you can edit it to meet your needs!
I personally use PowerPoint to create and play trivia games. You can find numerous templates online if you want to make your own games! Fill in your questions and your answers, and you are set!
Now, onto game play during class time. I have tried many different ways of playing trivia games, and this is the one I find to be the most effective and engaging:
- Classroom set-up: I like to divide my desks into rows for this game. (Rows?? you might be thinking, but I promise I have a reason!). On the first desk of each row, I put the following items: a mini white board, a dry-erase marker, and an eraser.
- I divide my students into teams of 3-5. Each team gets their own row. The person who is sitting at the front desk is responsible for writing down the answer to the question for their team for that round. Students can ask for and offer help to their team members, but the first person has to be the writer.
- I project the game board slide with the game categories and points values on my Smart Board so that all students can see it. Next, I decide which team gets to pick the first category/points value. (I usually have teams try to guess a number that I have written down on a piece of paper, and the team that is closest without going over gets to choose.)
- When the team has selected their category/points value, I show the question or prompt. Students write their responses on their mini white boards. The first team to hold up the correct answer wins the points. If none of the teams respond correctly, no points are awarded. I keep track of the teams’ points on the board.
- Return to the game board screen. I have my students rotate so that the first student, the one who wrote the last answer, moves to the back of the row and all other team members move up one seat. The team that won the points on the first questions chooses the next category/points value.
- Game play continues in this fashion until all questions on the game board have been attempted.
- Students then complete Final Jeopardy. Teams make a wager that will be added to their points totals if they answer correctly and subtracted if they answer incorrectly. You can decide if you want to give your students a time limit or impose any other restrictions!
- Finally, I add up the teams’ final points and award a winner! I usually offer a small prize for the winning team – a piece of candy or a bonus point on an upcoming test are my go-to prizes.
Game play usually takes a full 45-minute class period for me from start to finish.
Interested in trying a trivia game in your classroom? Here’s a freebie for you!
Try it Free!
Sign up below to receive a FREE Jeopardy-style trivia game on Spanish-speaking countries that your students will LOVE to play!
If you liked the freebie, check out my entire selection of ready-to-play trivia games to help save you time! Tomorrow’s lesson plans = done!
#3 Alfabeto

If I want to review vocabulary with my students, I am most likely to turn to a game my students have dubbed “Alfabeto.” I cannot take credit for inventing this game – I learned it from a former colleague, who learned it from her cooperating teacher. I am SO grateful that my colleague showed me this game, as it quickly becomes a student favorite every year. The best part is that, once you have your set of alphabet cards, there is ZERO PREP REQUIRED!
The purpose of “Alfabeto” is to have students spell their vocabulary words in Spanish. This is great for students of any level – I’m not sure about your kiddos, but even my upper-level students sometimes confuse the vowels like “e” and “i” and this game helps reinforce letter pronunciation!
The first thing that you need to play “Alfabeto” is two sets of alphabet cards. I made my alphabet cards in about 5 minutes! You need 27 pieces of construction paper or card stock in 2 different colors, so that you can have two teams. Then, you simply write one letter of the Spanish alphabet on each card, as big as you can! (I personally do not include any digraphs like “ll” or “ch”, but you could certainly include them if you wanted to!) You will also need a mini white board, a dry-erase marker, and an eraser when it is time to play.
So, how do you play “Alfabeto?” Well, I first divide the desks in my classroom into two groups that are facing each other. I place all students into one of two teams, making sure it’s an even split. Students sit down at a desk in the appropriate group.
I then distribute alphabet cards to students. Each team has its own set of alphabet cards that will be divided evenly among team members. Depending on the size of the class, students typically get 2-3 cards. Students are responsible for the letters on the cards that they have, and they have to know how to say the letters correctly.
I sit in the front of the two groups so that I can see everyone. I keep the mini white board, the marker, and the eraser with me so that I can keep score and keep track of what the students say. Depending on the level of the class, I will give them a vocabulary word in English or, for higher level students, a description of the vocabulary word in Spanish. For example, if we are studying clothing, I might ask them how to say “shirt” in Spanish, which is camisa. The student who has the letter “c” on each time is trying to be the fastest to raise the alphabet card in the air and say the name of the letter in Spanish. The person who is first gets a point for his/her team, and provides the opportunity for the team to win a second point by spelling the rest of the word correctly. So next, the student with the letter “a” must raise the card in the air and say the letter name, then the student with the letter “m,” and so on and so on until the word has been spelled. As students spell, I write the letters on the white board so that the teams can keep track of where they are.
If a team misspells the word, the other team has the opportunity to spell the word correctly from the beginning to earn the point.
The rub? Teams CANNOT verbally communicate with one another while they are trying to spell a word. They can use gestures like pointing and nodding, they can write the letters in the air with their fingers, and they even use sign language sometimes! They are NOT allowed to touch another teammate’s letters, however. Doing so, or using verbal communication, will forfeit play to the other team. Students get very creative in how they communicate with their teams!
I have my students swap their letters with another player on their team after a few rounds to give them the chance to practice with different letters.
Game play can last for as long or as little as you like! Because of the physical set-up involved, I usually play for 20-25 minutes.
Your students are going to LOVE this game, promise! And once you see it in action, you will too!
#4 Pictionary
After “Alfabeto,” Pictionary is my students’ favorite tech-free game to practice vocabulary. In my classroom, I change the rules of this classic game slightly to ensure more active participation from all students.
Prep for this game is simple! All you need to do is write the vocabulary words for your unit on slips of paper, fold them in half, and put them in plastic baggies. To make this faster, I like to print the words and use a paper cutter to cut them into strips. Since I like to play this game in groups of 4, I make up as many plastic baggies as I’ll need for the size of my class. The nice thing is that, once this is done, you’ll be able to keep the word sets for years to come!
I put students into their groups and the students in each group are broken down into two teams of two. Each group receives two mini white boards, two dry-erase markers, two erasers, and a plastic baggie with the vocabulary words inside. One student from each team will draw at a time. The artists select a word (the same word) from the plastic baggie and must draw it on their mini white boards for their partners to guess. They cannot speak or write any words to accompany their drawings. The partner that guesses the word correctly first wins a point for their team! Then, students switch roles for the next round.
Students get SUPER competitive with this game, and it is so fun to see their drawings!
I usually play this game for about 10-15 minutes, but you could play for a longer (or shorter) amount of time as you see fit!
#5 Relay Races

Relay races are another fun, low-prep and low-tech way to practice or review virtually any concept! Students get really excited to play, leading to higher engagement and more learning!
To prep for this game, I use PowerPoint. On each slide, I type 4-5 prompts or questions for students to answer. One slide will be used per round of the game.
To play, I set my desks up in rows. I divide the class evenly, and each team sits in a row. At the first desk, there is a mini white board, a dry-erase marker, and an eraser. When I display the slide with the prompts or questions, the first student writes the answer to #1, and passes the mini white board, marker, and eraser to the second student. That student writes the answer to #2 below the answer to #1, passes all the materials to the third student, and so on until every person in the row has had a turn. The last person in the row then brings the white board to me at the front of the classroom. The first team that brings me a white board with all the correct answers wins a point!
If a student notices a mistake with a previous response written on the white board, I either allow that student to make corrections, or I will have that student pass the white board back to the student who wrote the answer to fix the mistake. I allow teammates to collaborate and help each other if needed!
I also usually have students rotate seats after a few rounds, so that the same person doesn’t have to be the runner each time.
I like to play for about 10-15 minutes. It’s a great way to review if you have a few minutes before a test or quiz, or if you have a little bit of time left over at the end of a class period!
Thank you for reading! I hope this has given you some ideas or has inspired you to try something new in your classroom! If so, I’d love to hear how it went!
